BX:1x OS X
From CCGB
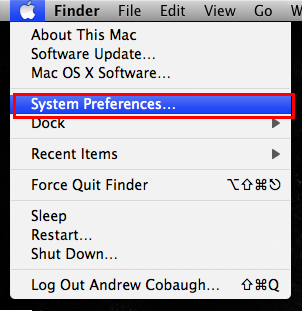
- Open System Preferences
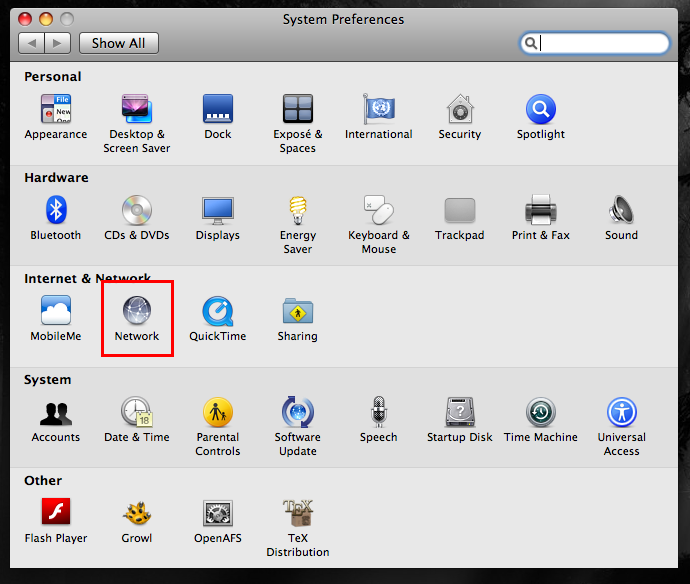
- Select Network
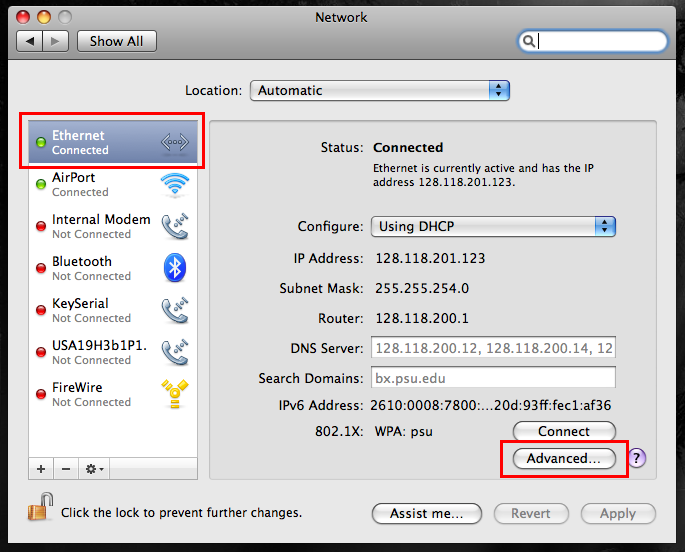
- Make sure your wired ethernet adapter is selected, and select Advanced
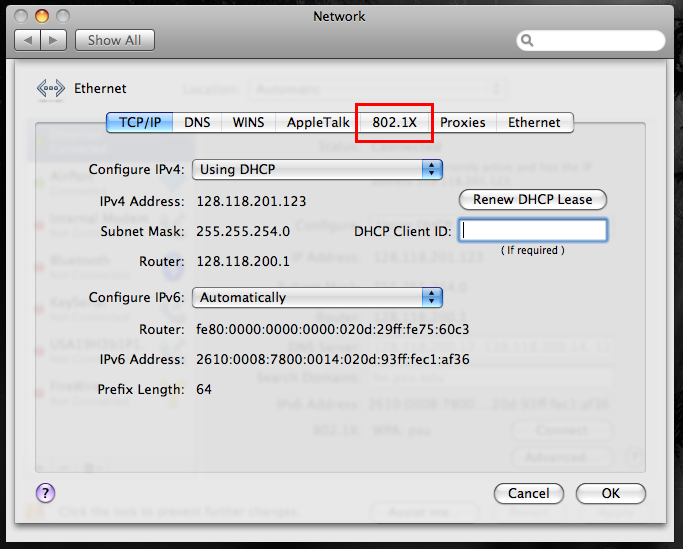
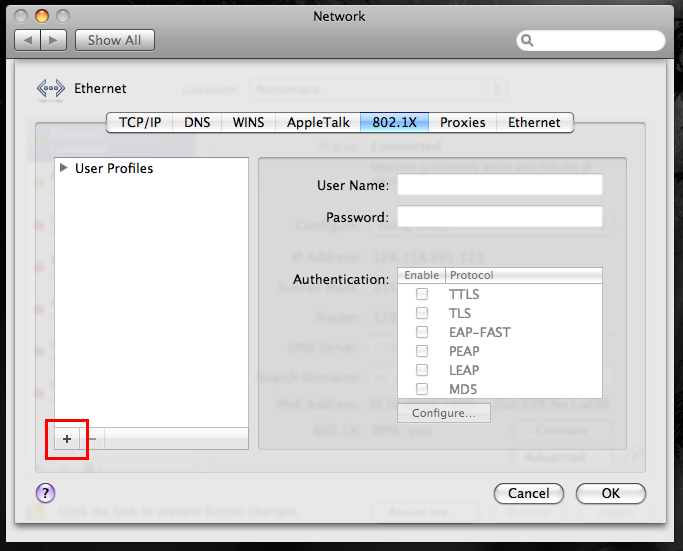
- Select 802.1X from the tabs at the top
- Select + to add a new User Profile
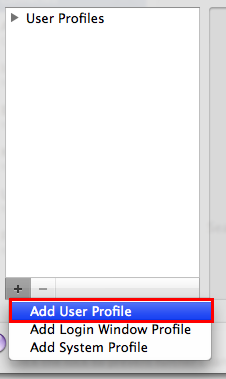
- Select Add User Profile
- Choose a name for the profile so that you will know what it is. Name doesn't matter.
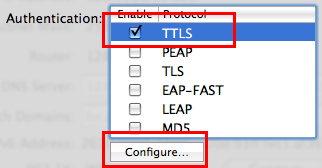
- Make sure that only TTLS is checked, select it, and click on Configure
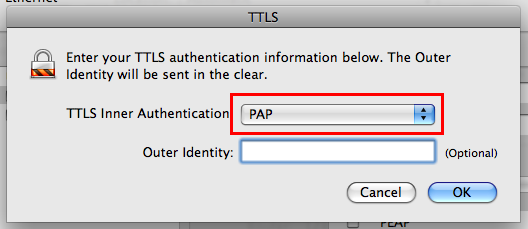
- Select PAP for TTLS Inner Authentication. Leave Outer Identity blank.
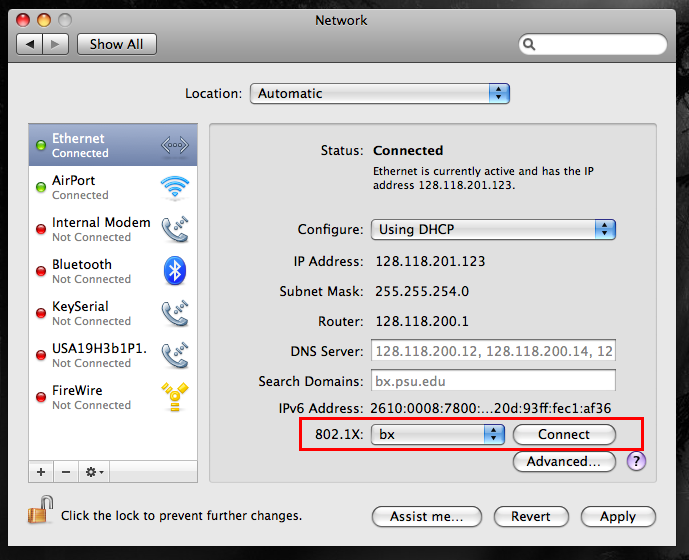
- Click OK then Apply to return to the device screen. Select the 802.1X profile you just created and click Connect
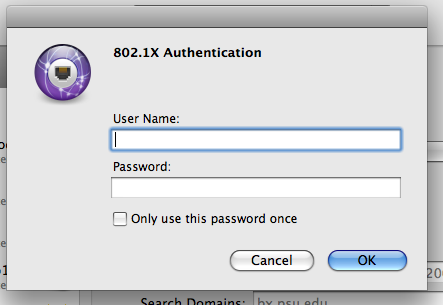
- You will be prompted with a username/password dialog. The username and password you use depends on whether you want to connect with your BX account or PSU Access Account.
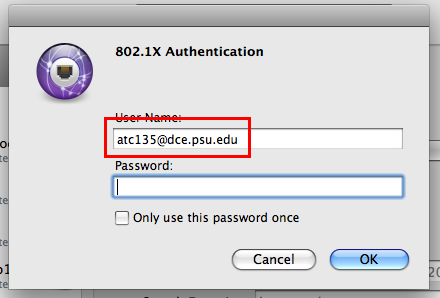
- If connecting with your PSU Access Account, the username should be of the form uid@dce.psu.edu. This is case-sensitive! Password will be your PSU Access Account password.
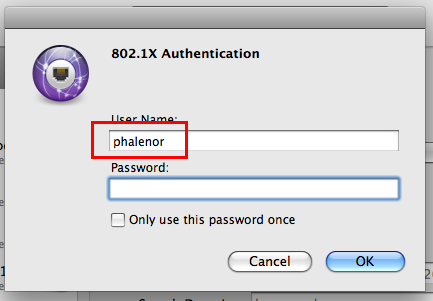
- If connecting with your BX Account, the username should be of the form uid, and the password will be your BX Account password.
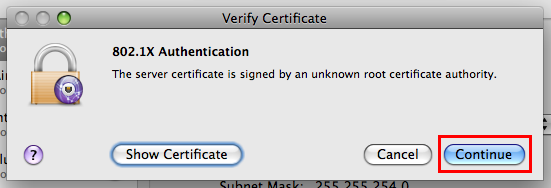
- Finally, select Continue to accept the 802.1X Server Certificate.
- If the connection was successful, you will see this, and you should receive an IP Address that looks like 128.118.202.???
