Difference between revisions of "BX:Printing to ipp from OS X"
From CCGB
| Line 13: | Line 13: | ||
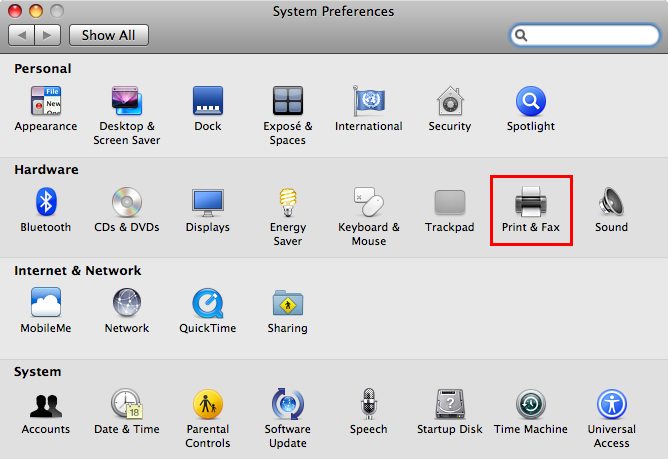
* Select '''Print & Fax''' | * Select '''Print & Fax''' | ||
| + | |||
[[File:Ipp_printer_osx_leopard-2.png]] | [[File:Ipp_printer_osx_leopard-2.png]] | ||
| + | |||
<hr> | <hr> | ||
| + | |||
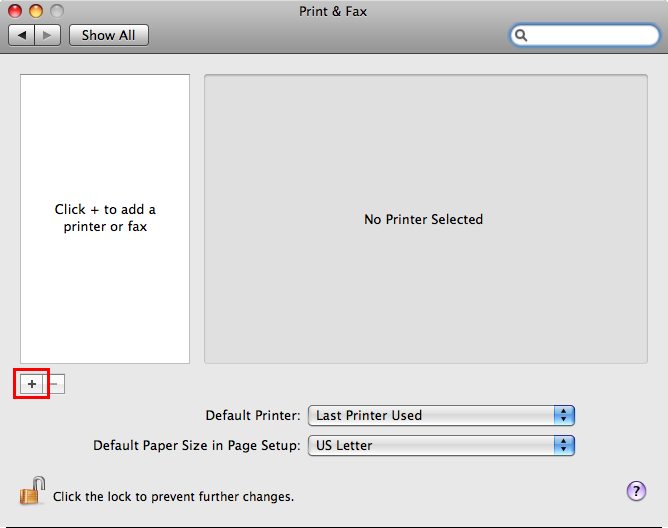
* Select the '''+''' to add a new printer. | * Select the '''+''' to add a new printer. | ||
| + | |||
[[File:Ipp_printer_osx_leopard-3.png]] | [[File:Ipp_printer_osx_leopard-3.png]] | ||
| + | |||
<hr> | <hr> | ||
| + | |||
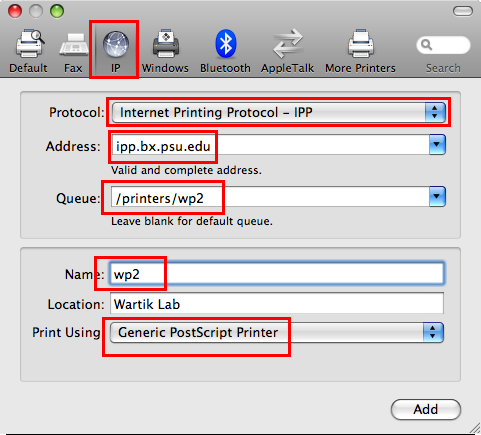
* Select '''IP'' from the top pane. | * Select '''IP'' from the top pane. | ||
| Line 31: | Line 37: | ||
** '''Name''' = Name of the printer. Can be anything you want. | ** '''Name''' = Name of the printer. Can be anything you want. | ||
** '''Print Using''' = Generic PostScript Printer | ** '''Print Using''' = Generic PostScript Printer | ||
| + | |||
[[File:Ipp_printer_osx_leopard-4.png]] | [[File:Ipp_printer_osx_leopard-4.png]] | ||
Revision as of 17:25, 10 December 2010
These screenshots and instructions were done based on OS X 10.5 (Leopard). Tiger and Snow Leopard should be similar.
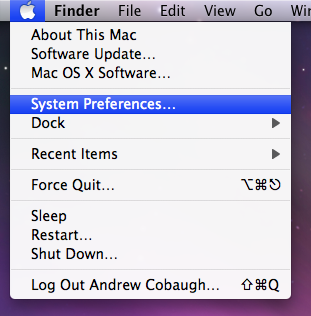
- Open System Preferences
- Select Print & Fax
- Select the + to add a new printer.
- Select 'IP from the top pane.
- Fill in the following values. The wp2 printer is shown in the image just as an example.
- Protocol = Internet Printing Protocol (IPP)
- Address = ipp.bx.psu.edu
- Queue = /printers/printername, where "printername" is the name of the printer you want to use.
- Name = Name of the printer. Can be anything you want.
- Print Using = Generic PostScript Printer


